

RB750 / 750G - Setup for UniFi
Thanks to LYN member Oreomambo for advising how to setup this device for UniFi !
Also thanks to Soliton SG's technical staff Neb for his remote support !
Initial setup was posted here.
Notes:
- This 2-in-1 device has vlan tagging (500 for Internet & 600 for IPTV) and router functions, it does not have wifi
- This device has lots of advance features and functions (honestly I still not fully understand all yet!), advance user will appreciate and like this device
- User may need to setup a wifi router
- Since I'm not technical enough to use codes to program the device, I personally prefer to use the WinBox (window base) to configure the unit
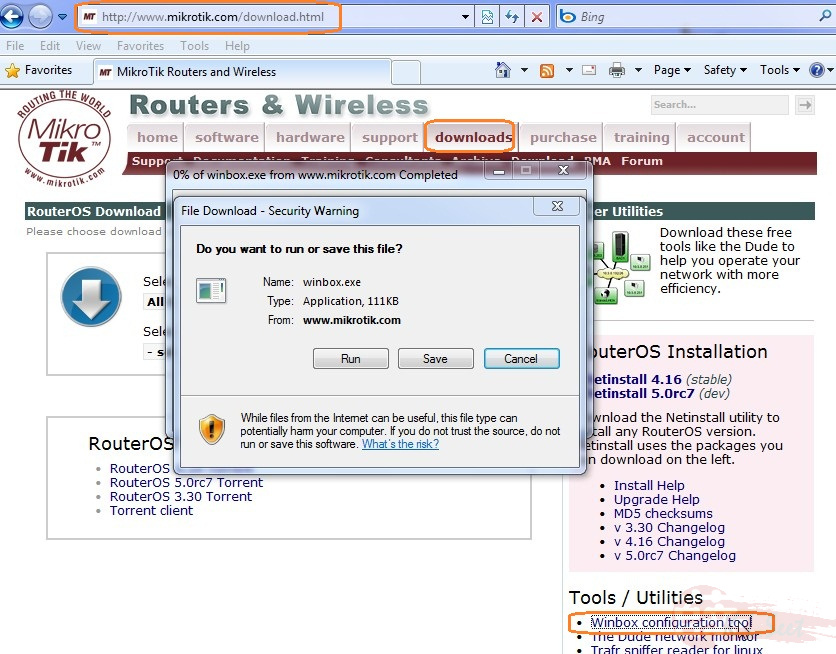
- You may download the WinBox here or visit http://www.mikrotik.com/download.html and select "Winbox configuration tool" under "Tools / Utilities" section to download
- Default IP is 192.168.88.1 user ID is "admin" with blank password
- You need to set your PC/laptop with static IP 192.168.88.x subnet 255.255.255.0 to access the device
- This setup for UniFi is just basic to connect internet & IPTV only, you may need to refer the following links for further setup on:
Setup for UniFi:
Hard reset the unit first!
Go to MikroTik download section, download the latest WinBox Tool to your computer
Connect your computer to either Port 2/3/4 of the RB750/750G
Then run the WinBox.exe

Click the radio button to search & select the RB750/750G device
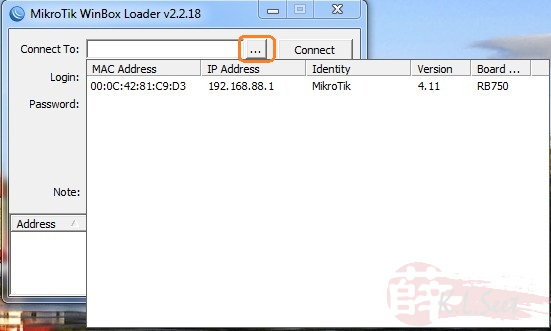
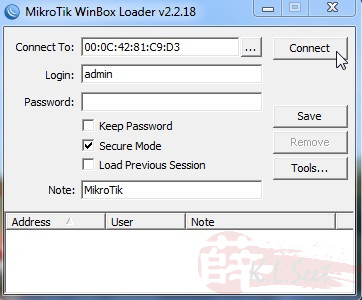
Enter default login: admin with blank password
Click "Connect"
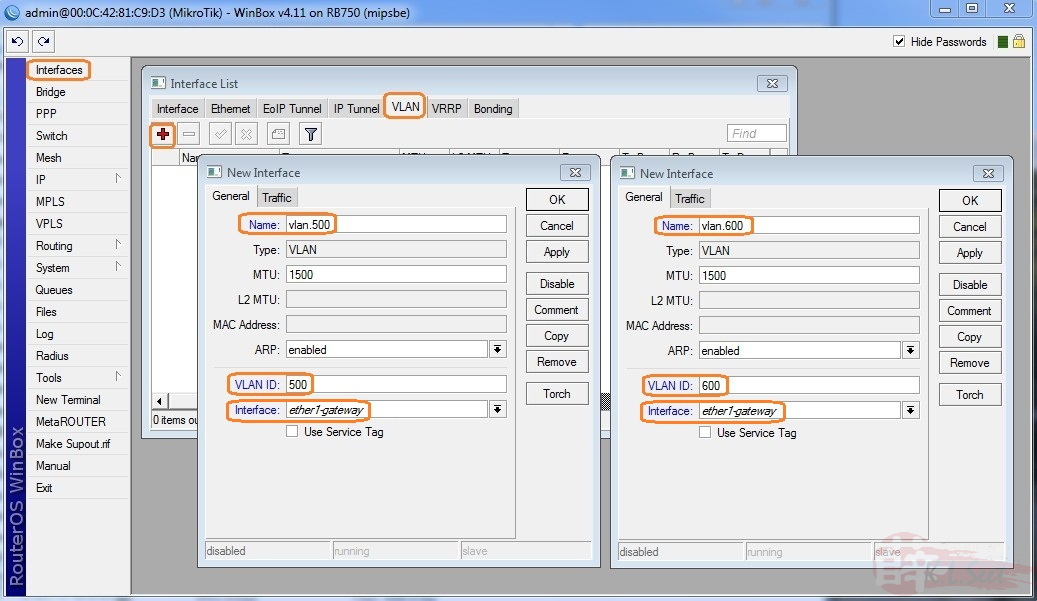
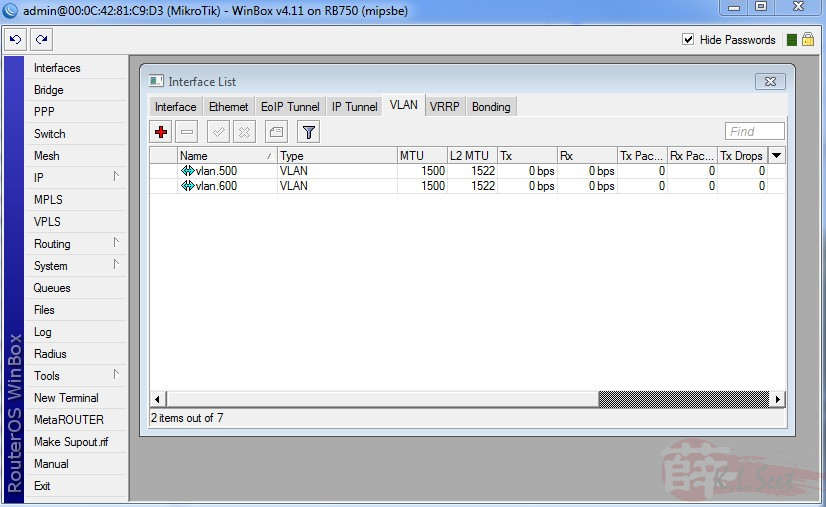
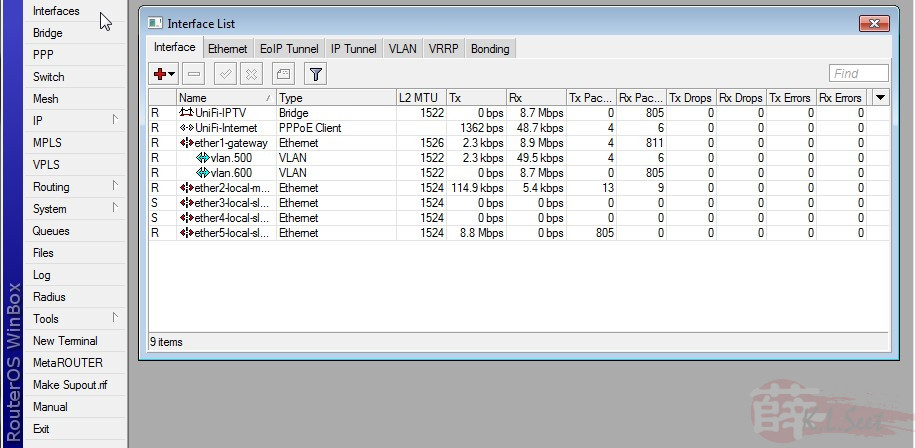
Go to "Interfaces" select "VLAN" tab, add the following vlan 500 & 600, click "OK" when done
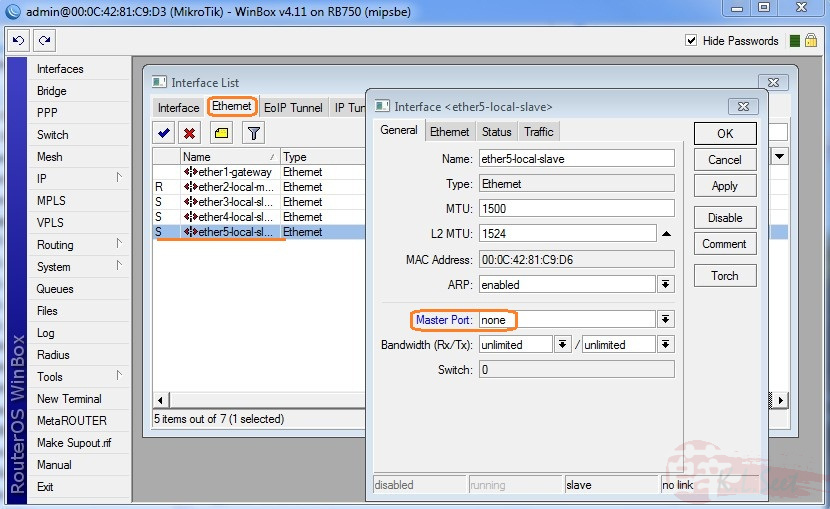
Select "Ethernet" tab, select "ether5" and setup "Master Port" as none, click "OK" when done
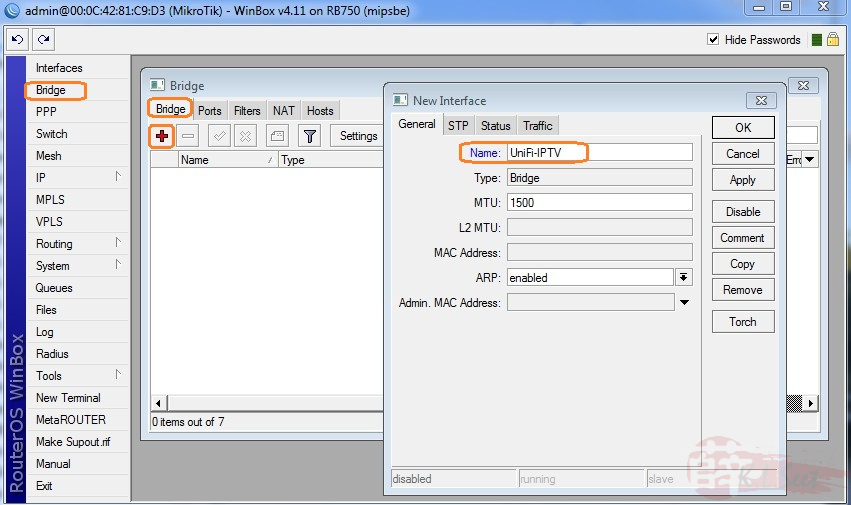
Go to "Bridge" and select "Bridge" tab, create a bridge called "UniFi-IPTV", click "OK" when done
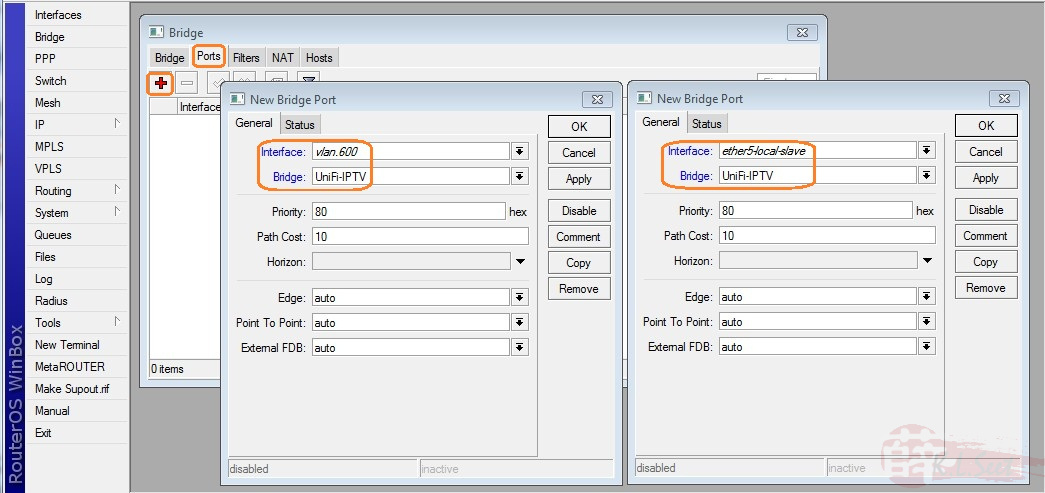
Click on "Ports" tab, create 2 ports as follow for IPTV, click "OK" when done
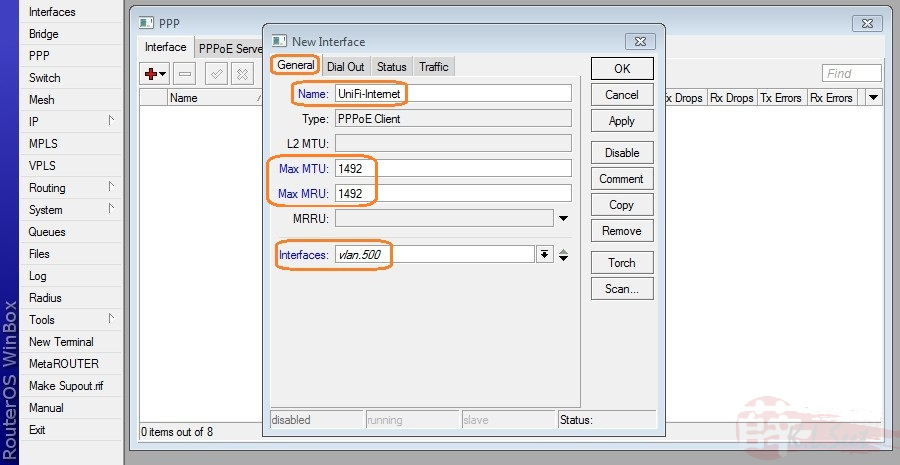
Go to "PPP" and select "Interface" tab, add and choose "PPPoE Client"

Enter the following at "General" tab
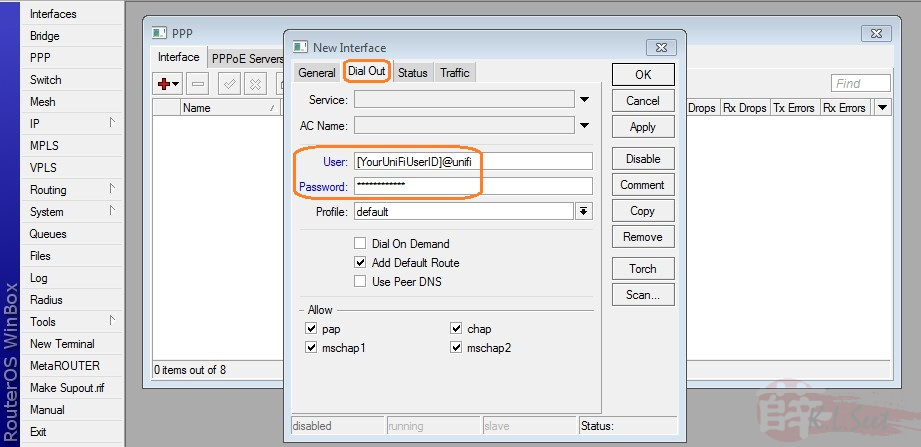
Enter your UniFi user ID & password at "Dial Out" tab, click "OK" when done
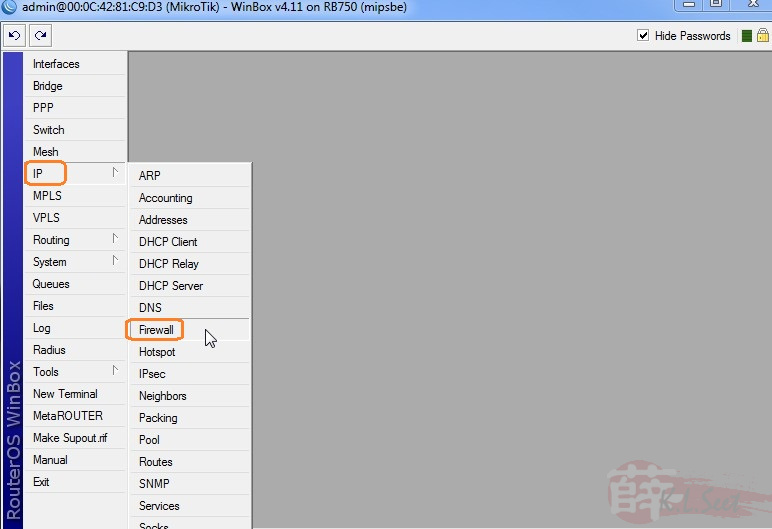
Go to "IP --> Firewall"
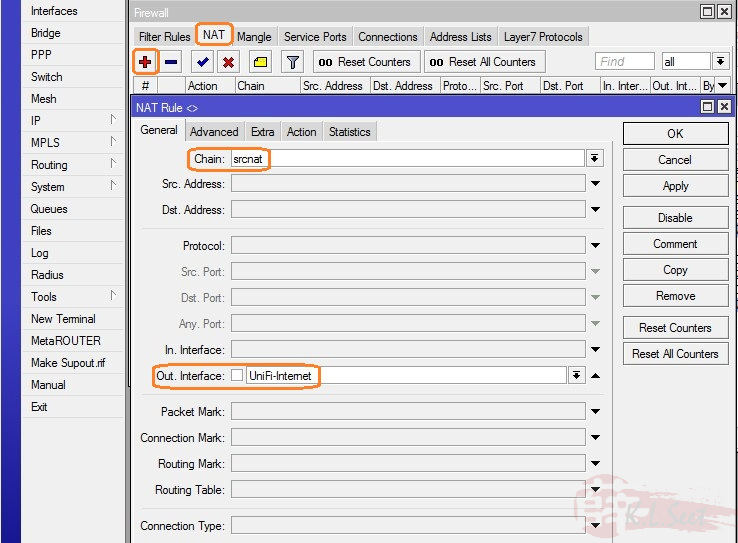
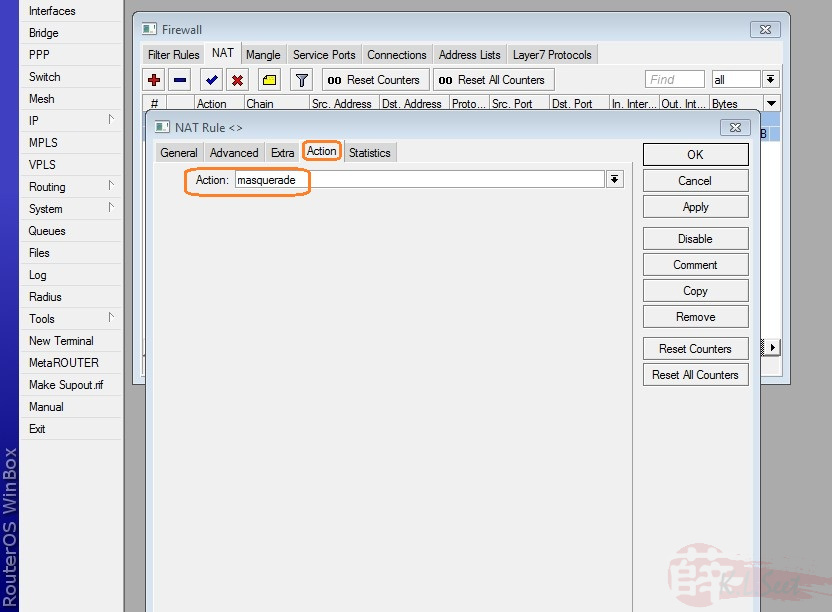
Click on "NAT" tab, add/change the NAT as follow, click "OK" when done
23Apr2011 Update - Thanks Rizvanrp for highlighting the Out-Interface setting in order for the port forward to work properly! 
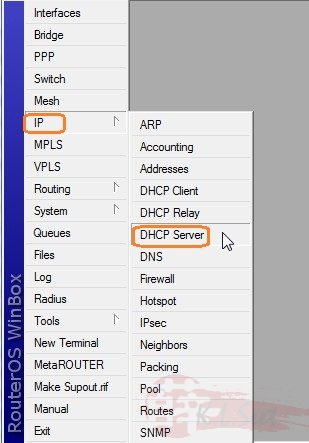
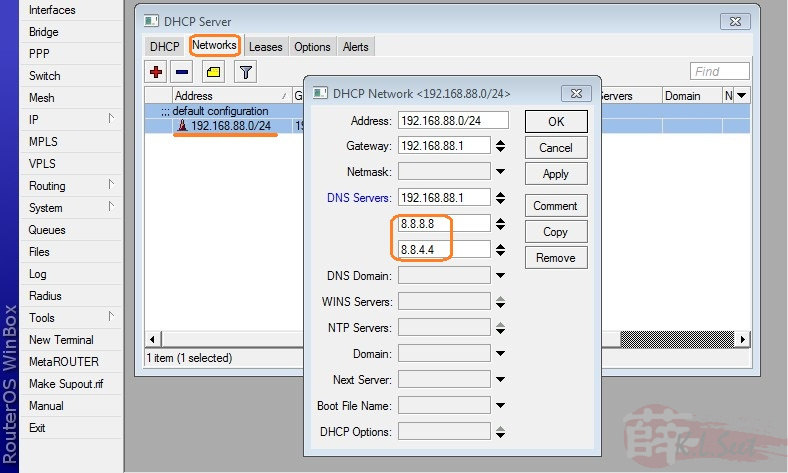
Go to "IP --> DHCP Server"
Select "Network" tab, enter Google DNS (or your preferred DNS) as follows, click "OK" when done
Can also consider OpenDNS = 208.67.222.222 & 208.67.220.220
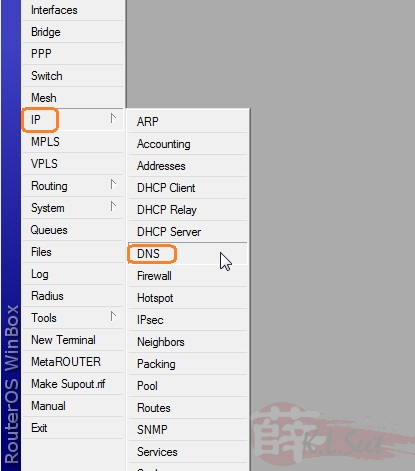
Go to "IP --> DNS"
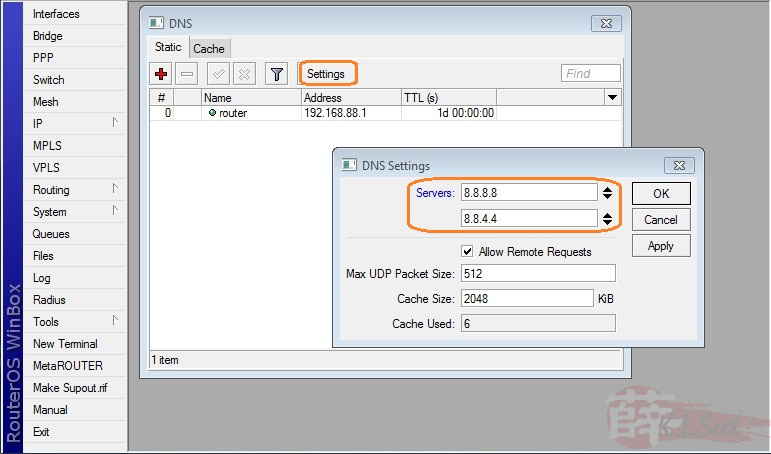
Enter Google DNS (or your preferred DNS) at "Settings" tab, click "OK" when done
Can also consider OpenDNS = 208.67.222.222 & 208.67.220.220
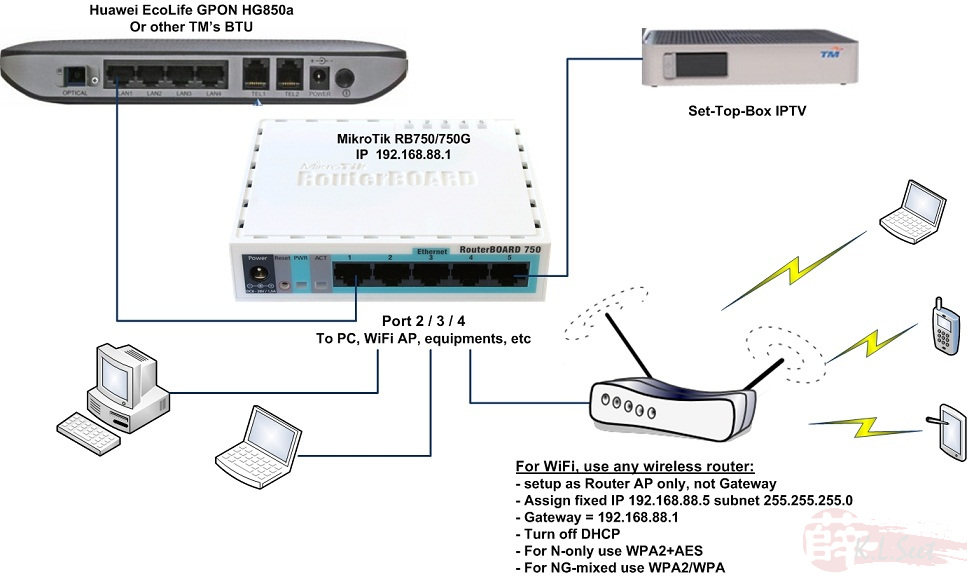
Setup completed, connect cables per following connection diagram.
System connected!
Connection:
BTU[Port1] --> [Port1]RB750/750G[Port2/3/4] --> <computer / laptop/ wifi AP>
BTU[Port5] --> [LAN]Set-Top-Box IPTV