


RT-N16 - ASUSWRT New UI Setup
The beta firmware is from ASUS which I've tested on my Huawei HG850a without any problem.
The instruction is clear enough, please spend some time to read through, fully understood it before email me.
Should there be any issue which I'm able to duplicate the same issue, I'll do my best to forward to ASUS engineer for further investigation.
Please note I don't own the firmware and I don't sell the product either, you buy and flash at your own risk.
UniFi Setup Pre-Requisite:
- Download the latest beta firmware, ensure the DM5 checksum is correct
- Perform clean flash, read carefully & fully understood the Factory Restore procedure through WebGui . (Note: If fail or brick, then use Firmware Restoration (Win7) method)
- Get ready your UniFi PPPoE user ID & password (it's case sensitive!), it was written on the installation sign-off document, under the section "High Speed Internet - xx Mbps". If you are not sure, call TM CS, just tell them you want to change your own router, they MUST provide you !
- Setup as per following guide. (Again, during setup, DO NOT connect WAN or WiFi, only connect 1 cable to the device's LAN 2/3)
- During the initial setup, it require WAN port to be connected, just connect any cable with an active device will do, DO NOT connect with the BTU/VDSL2 first!
- Connect as per diagram (at the end of this article), ensure you connect the cables to the correct ports !
After Factory Restore, login and go straight to "Administration --> Firmware Upgrade" to upgrade the new firmware
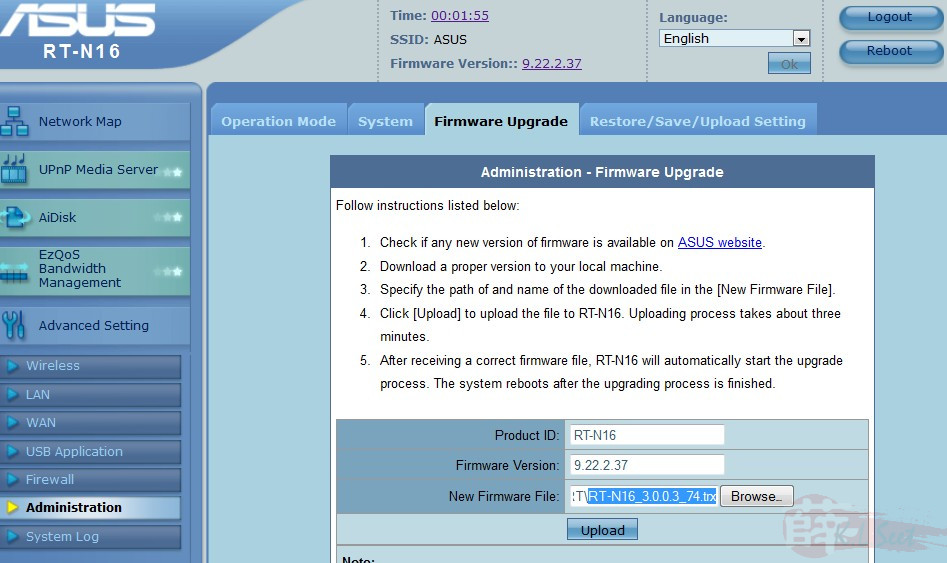
DO NOT touch anything until it's fully completed !!

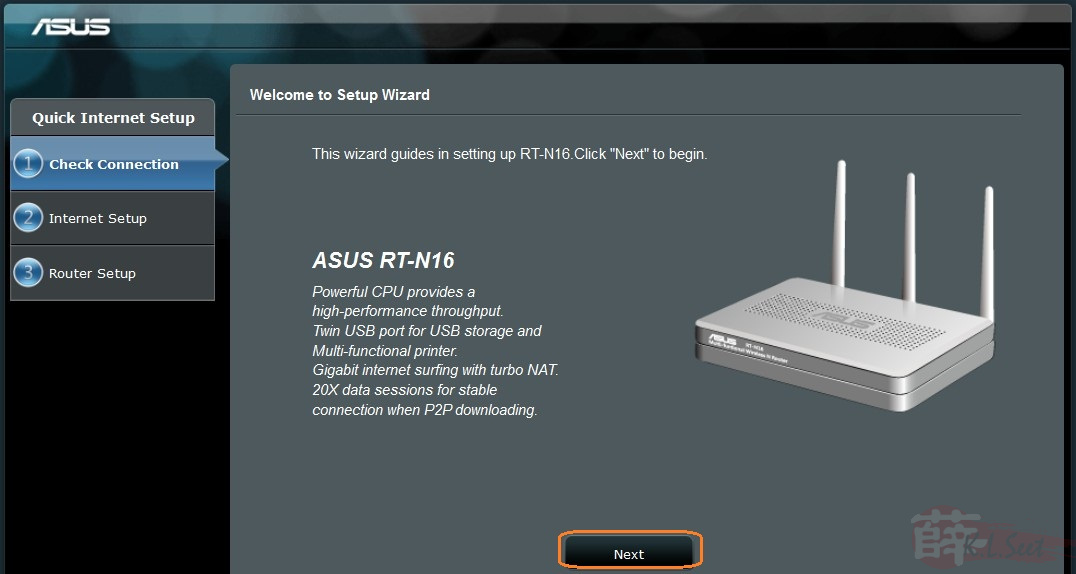
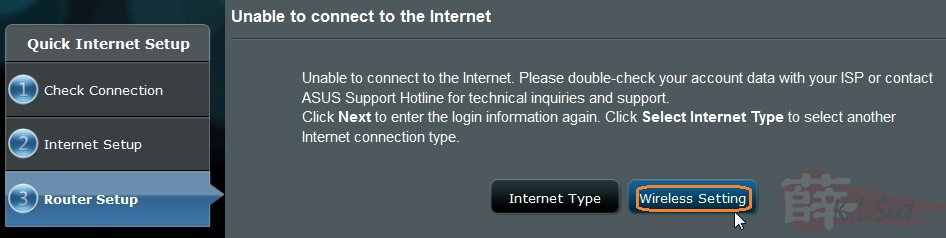
The following screen will show after upgraded successfully, check Next to continue
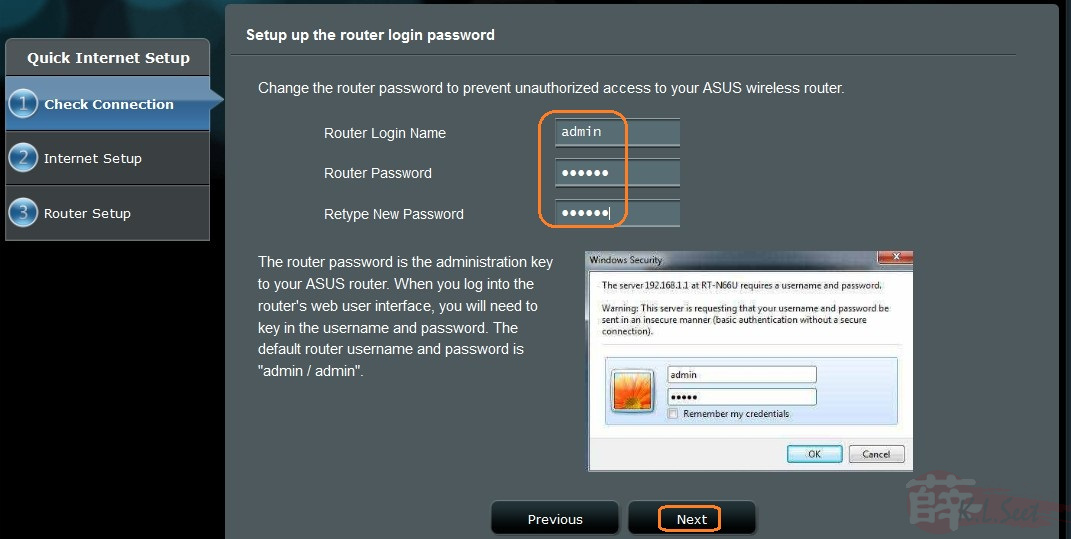
Enter your prefer router login name & password accordingly, click Next when done
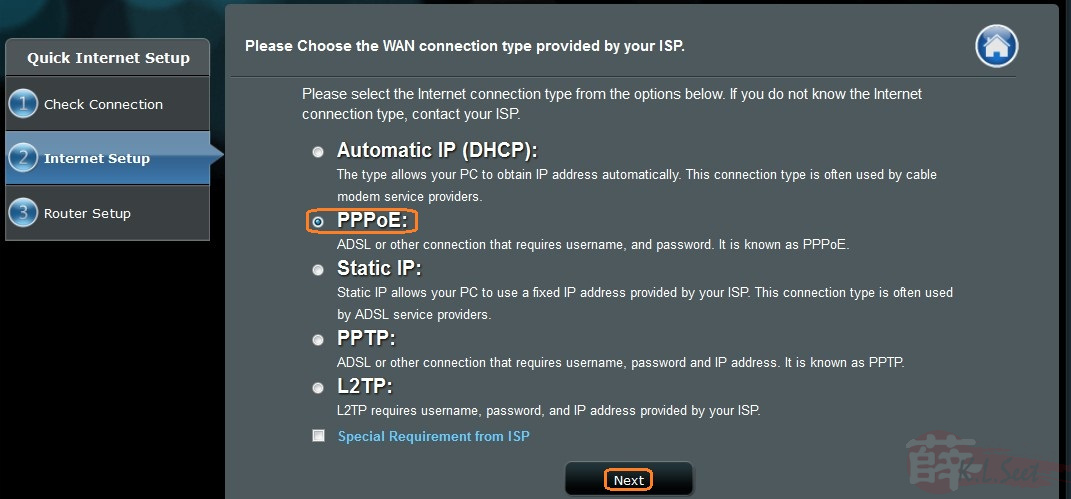
Choose PPPoE for WAN connection, click Next when done
(Note: need to plug-in cable to WAN port to continue, just plug-in any LAN cable will do, DO NOT connect to the BTU/VDSL2 !)
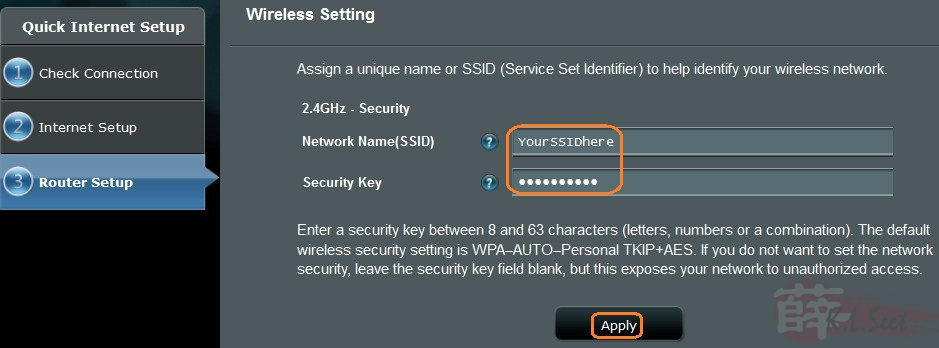
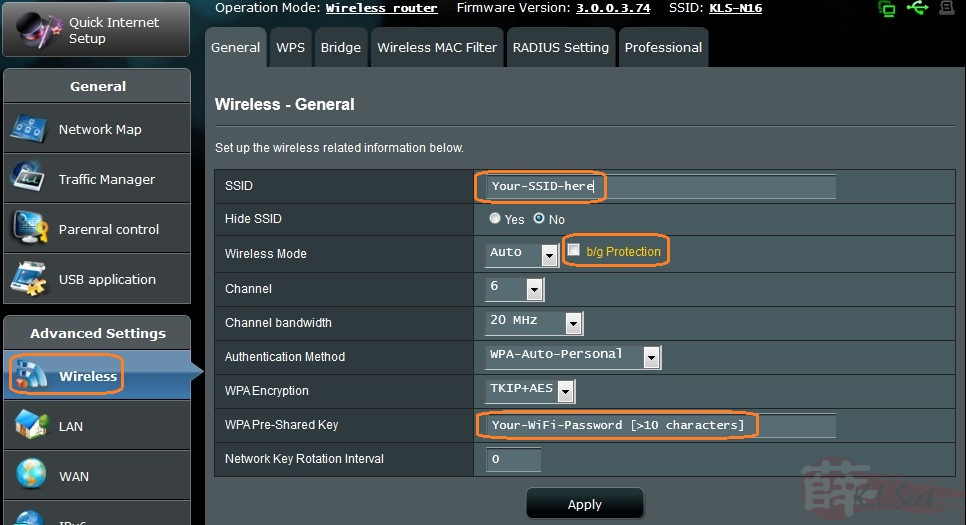
Wireless Setup
Enter your desire SSID and WiFi password (use at least more than 10 characters), click Apply when done
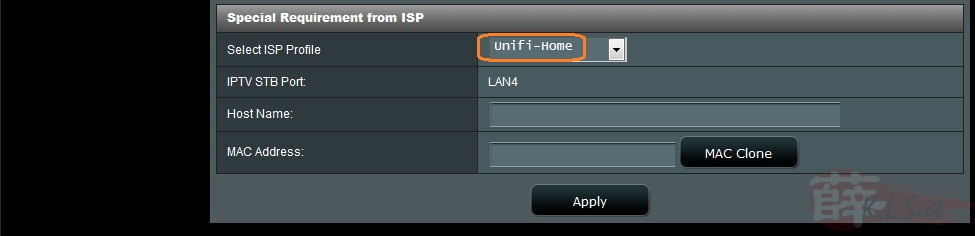
Once completed the above, go to WAN setup again, check & enter the following again, click Apply when done

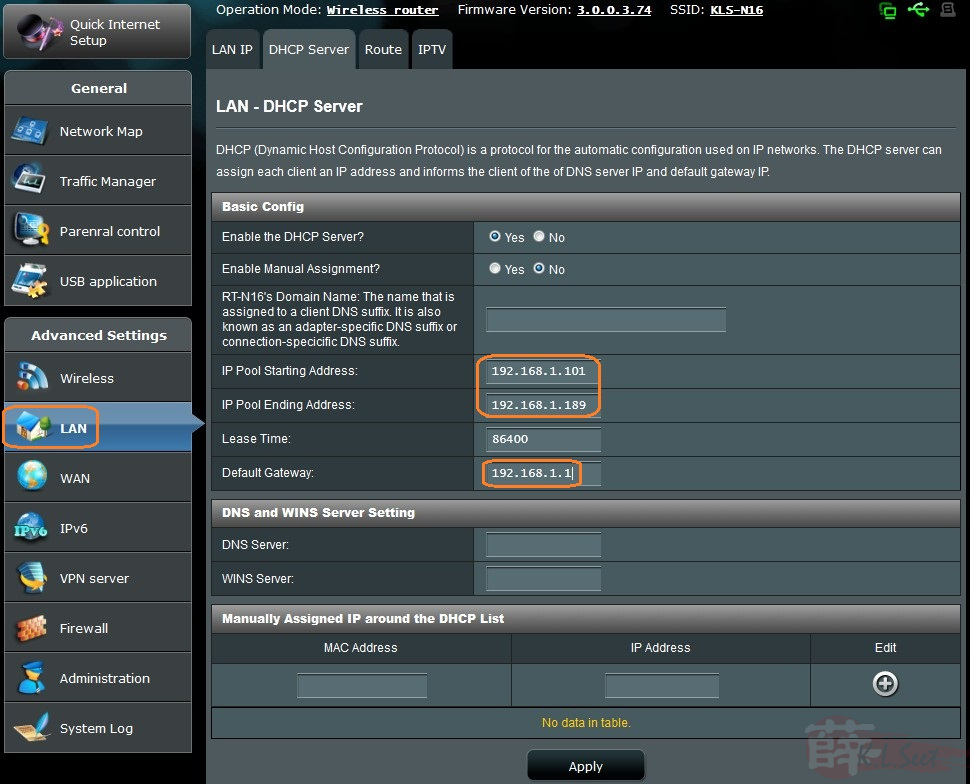
Go to LAN, try to assign a smaller IP pool and enter the device's IP as the Gateway, click Apply when done
Go to Wireless, setup as follows
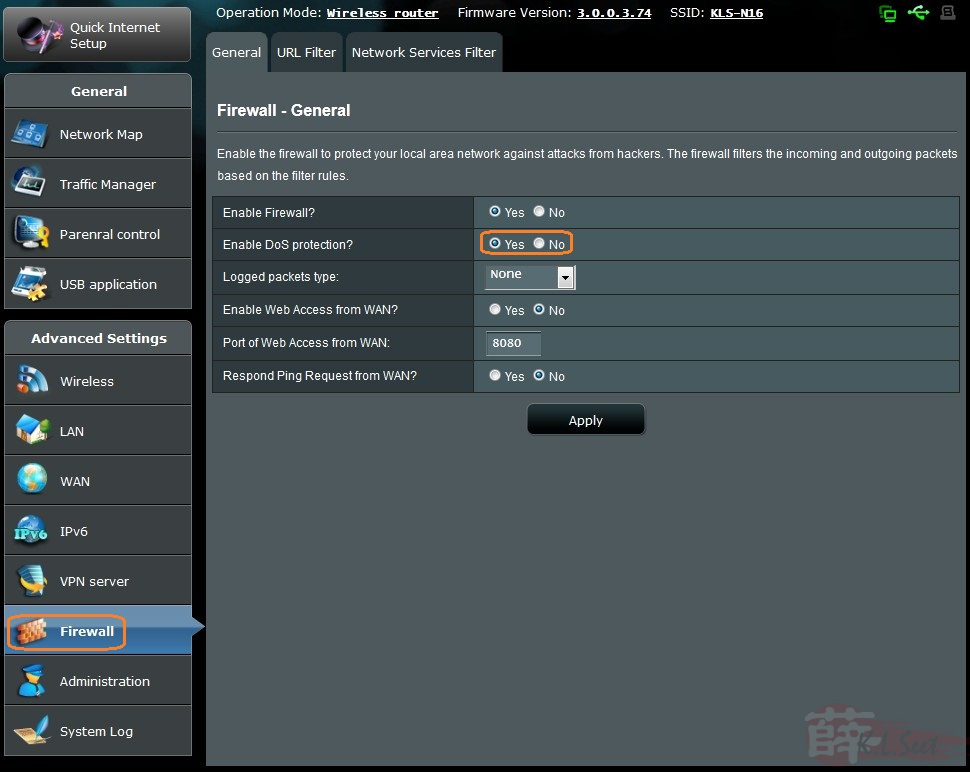
Go to Firewall, enable the DoS protection
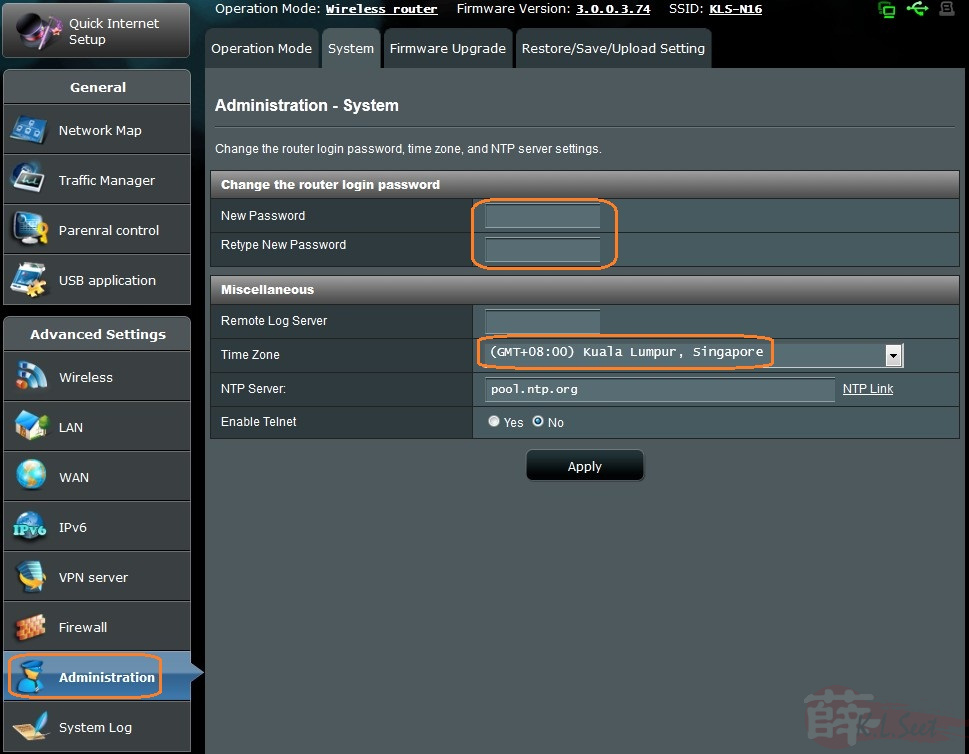
Go to Administration -->System tab, check/enter the following
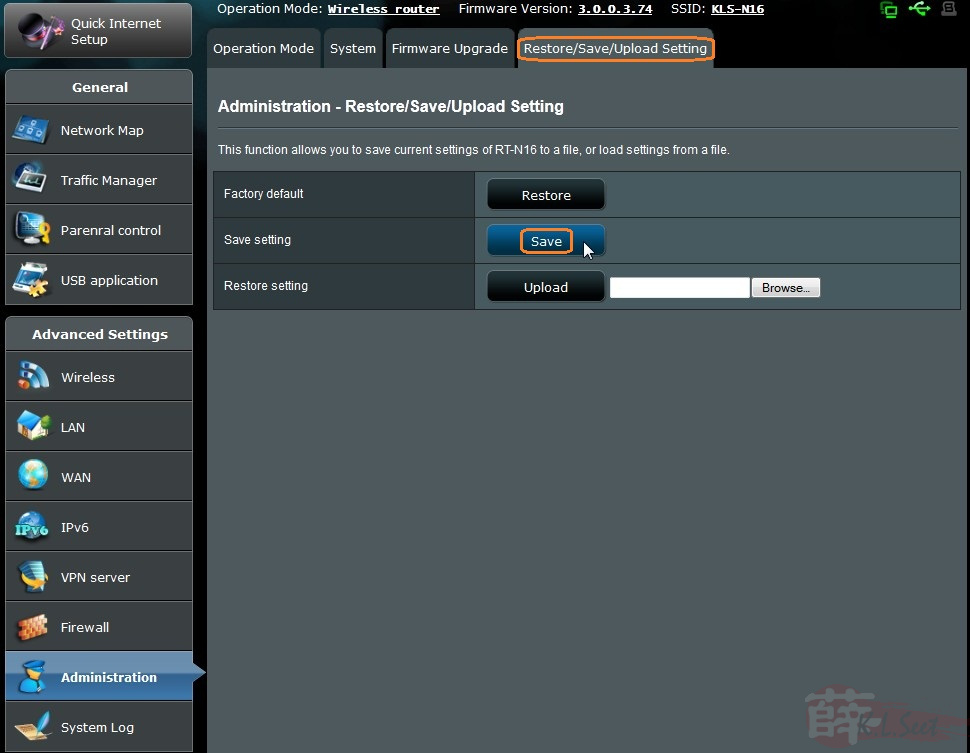
Once setup is completed, always Save & backup the setting file
Basically setup is completed, connect as per diagram and enjoy ! 
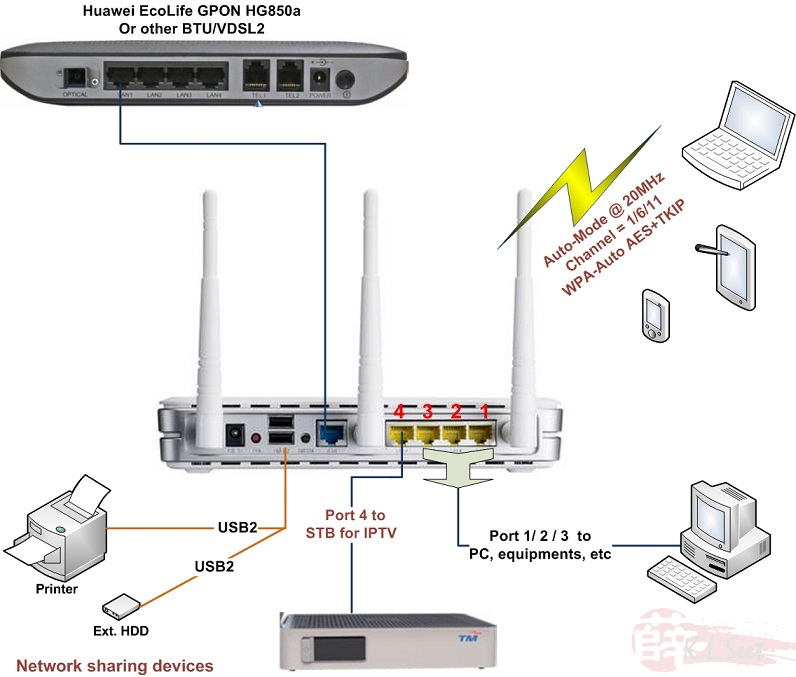
Connection Diagram
- Turn off all equipments, wait for at least 2 mins
- Connect as per following diagram
- Power on BTU/VDSL, wait until it's completely booted up, say at least 2 mins, ensure the VoIP is working first
- Power up the device, ensure the IPTV is working first, then enjoy !!
For new ASUSWRT firmware:
.